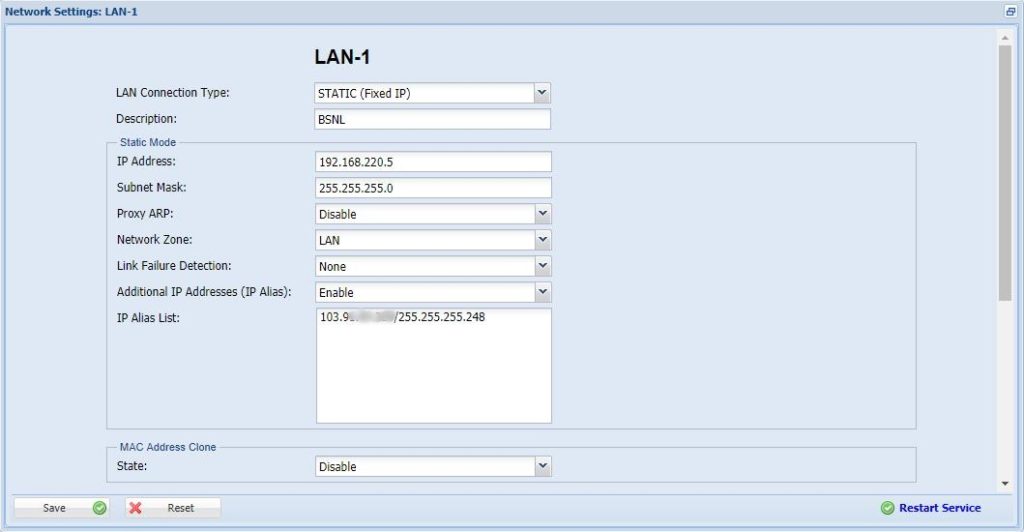

4. Give the Public IP Gateway and Subnet Details Provided by ISP. Ex:103.xxx.xxx.xxx/255.255.255.248
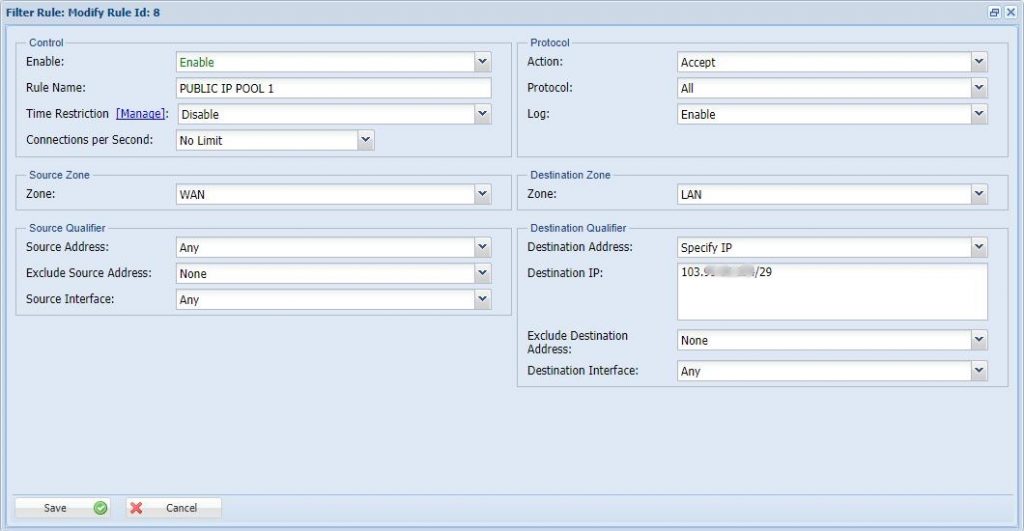
5. Now Go To Configuration > Firewall/Nat > Filter Rules > Add
6. Enable the Rule and Give the Rule Name for Your Reference. Eg: PUBLIC IP POOL 1
7. Mention the Time Restriction. Eg: Disable
8. Mention the Connection per seconds. Eg: No Limit
9. Mention the Action option in the Protocol Tab. Ex: Accept
10. Mention the Protocol Option. Ex: All
11. Mention the Source Zone Tab and Select the Interface WAN.
12. Mention the Destination Zone Tab and Select the interface LAN
13. Mention the Source Qualifier Tab Select the Source Address. Eg: Any
14. Mention the Exclude Source Address. Eg: None
15. Mention the Source Interface. Eg: Any
16. Mention the Destination Qualifier Tab and Select the Destination Address as Specify Ip.
17. Specify the Destination Network Address and subnet provided by the ISP. Eg: 103.xxx.xxx.xxx/29
18. Mention the Exclude Destination Address. Eg: None
19. Select the Destination Interface. Eg: Any
Click Save to save the Configuration.
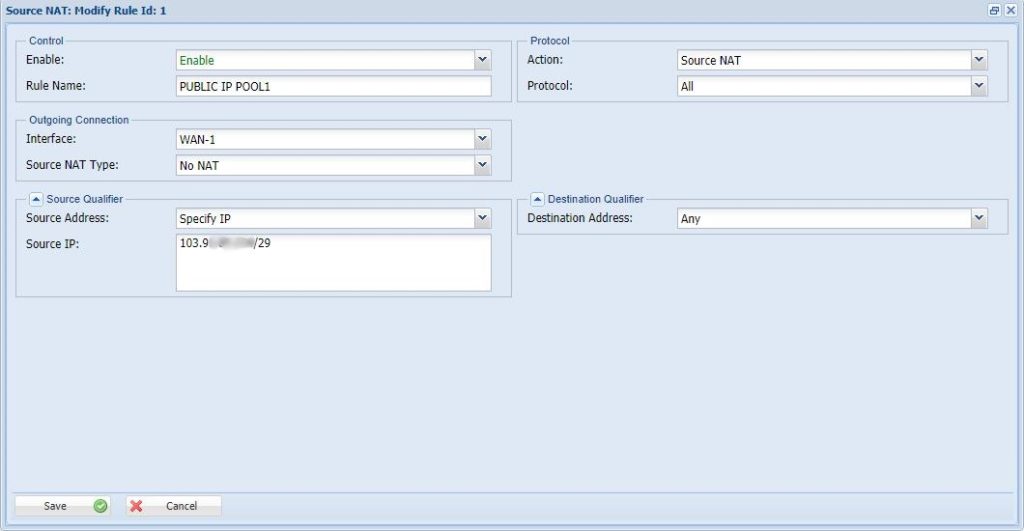
20. Now Go to Configuration > Firewall/NAT >Source NAT.
21. Enable the Rule and Give the Rule Name For Your Reference. Eg: PUBLIC IP POOL1.
22. Mention the Protocol Tab Select the Action Option as Source NAT.
23. Select the Protocol Option as ALL.
24. Mention the Outgoing Connection Tab and Select the Interface of the ISP. Eg: WAN-1
25. Select the Source NAT Type as No NAT.
26. Mention the Source Qualifier Tab and Select the Source Address as Specify IP.
27. Mention the Source Network Address subnet provided by the ISP. Eg: 103.xxx.xxx.xxx/29
28. Mention the Destination Qualifier Tab and Select the Destination Address as Any.
29. Click Save to save the Configuration.


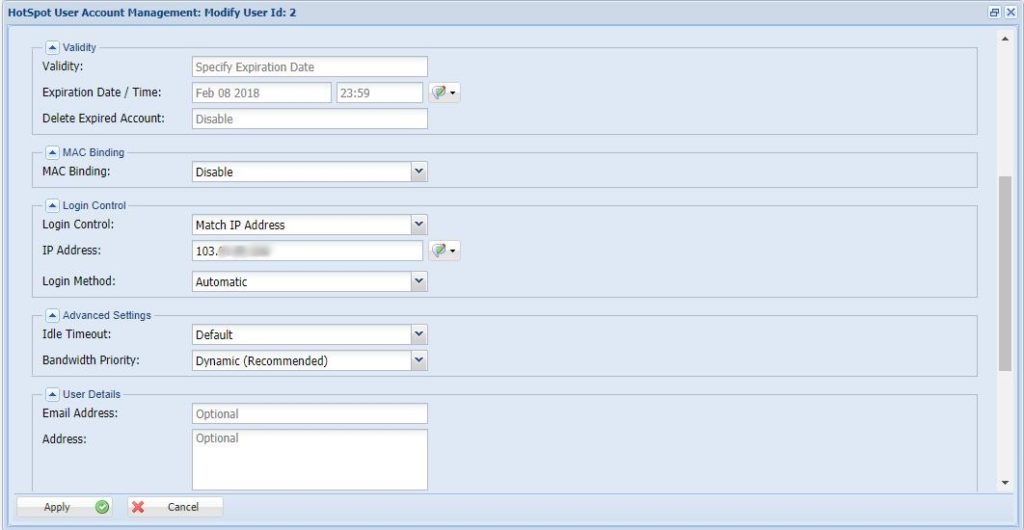
30. Now Go to Configuration > Hotspot >User Management > Add
31. In the User Creation Mention, the Login Control Assign the Public IP to the user.
32. Now the Public was Configured and Assigned to the user successfully
Note:
1) This is not RDP over VPN or hosted in cloud platform.
2) No changes to your office network or any additional program to run in tally server
