How To Configure The Alternative DNS
What do you need help with?
DNS servers translate URLs (easy for humans to remember) to IP addresses (unique for each device) for the target server. The preferred DNS server is the “first choice” of your device when making a request for translation. Now if the primary DNS server can’t translate your request, you will not contact the alternate DNS server to try as they both share the same data. Primary DNS servers have a master copy of address data, and this is transferred between serves using “DNS zone transfer” to replicate DNS databases across a set of DNS servers.
Alternate DNS servers are specified for load balancing on busy networks, if the primary DNS server is busy, it can forward requests to the alternate DNS server.

Step 1: Login to the Tacitine. (If you are configuring the Tacitine for the first time, the default Lan IP is http://192.168.100.1) and default username: admin & Password: admin99
Step 2: Click the Configuration > Network Setting tab.
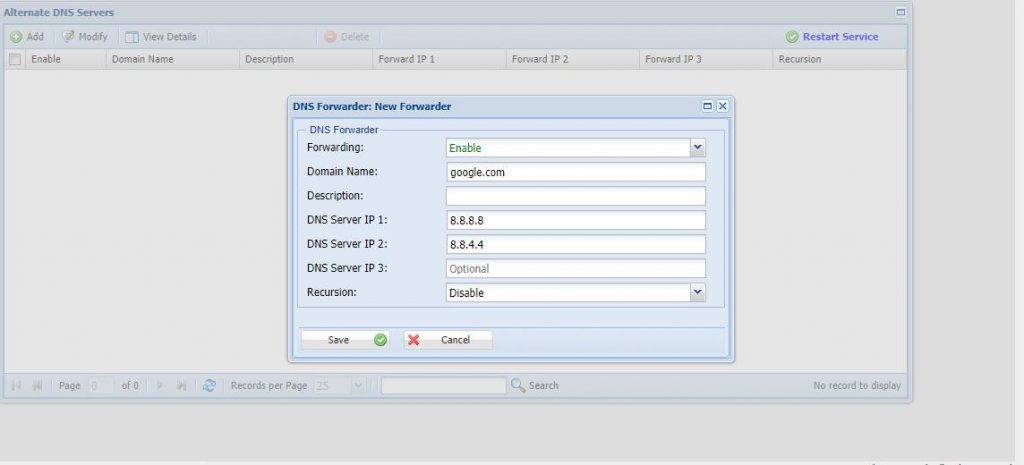
Step 3: Click the Alternate DNS Server > ADD
Step 4: Click the Forwarding > Mode (ENABLE)
Step 5: Click the Domain Name > *.*
Step 6: Click the DNS server
DNS 1: 8.8.8.8
DNS 2: 4.4.2.2
Step 7: Click Save > Restart Services


